


Ultimate Crispy Philly Cheesesteak Wraps: A 30-Minute Delight
Imagine biting into a delectable blend of thinly sliced beef, melted cheese, and sautéed vegetables wrapped in a crispy tortilla. This Ultimate Crispy Philly Cheesesteak Wrap is an exciting twist on a classic favorite that you can whip up in just 30 minutes. Perfect for a quick dinner or a satisfying lunch, this recipe brings together the savory essence of a traditional Philly cheesesteak with the added crunch and convenience of a wrap.
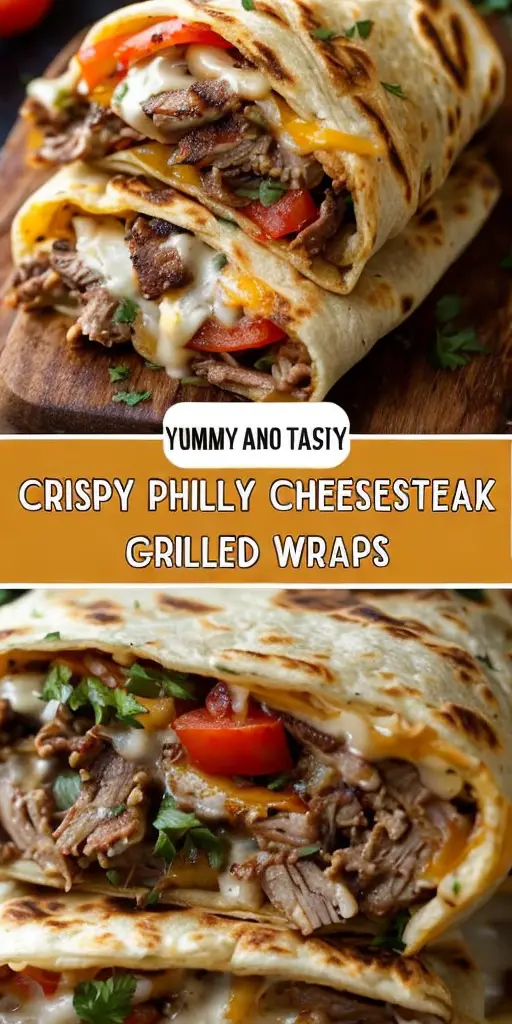
The flavorful beef mingled with onions and peppers is perfectly enveloped by the gooey richness of provolone cheese. As you toast the wrap to golden-brown perfection, the senses are tantalized with the aroma of sizzling steak and cheese. Whether you’re a long-time cheesesteak enthusiast or exploring it for the first time, this wrap delivers satisfaction in every bite.
Quick Recipe Highlights
- Flavor Profile: Juicy steak is complemented by the sweetness of bell peppers and the sharpness of provolone cheese, creating a mouthwatering combination.
- Texture: A crispy tortilla shell houses tender, juicy beef and velvety cheese, offering a delightful contrast in every bite.
- Aroma: The intoxicating scent of sizzling beef and melting cheese is sure to draw everyone to the kitchen.
- Visual Appeal: A beautifully toasted wrap with vibrant greens and bright peppers promises as much flavor as it delivers visually.
- Skill Level Needed: Basic sautéing and assembly skills make this recipe accessible to everyone, from novice cooks to experienced home chefs.
- Special Equipment: A skillet is essential for cooking the steak and vegetables to perfection, while a panini press or grill pan adds that crunchy exterior.
Recipe Overview
- Difficulty Level: This recipe is considered easy due to the straightforward steps of slicing, cooking, and assembling.
- Category: Perfect as a quick lunch or supper, these wraps fit comfortably into the category of fast, satisfying meals.
- Cuisine: An American classic with a touch of modern culinary convenience, blending urban street food vibes with home-cooked comfort.
- Cost: With affordable ingredients like beef steak, onions, peppers, and tortillas, this meal is budget-friendly while remaining flavorful.
- Season: Best enjoyed any time of year due to its universal appeal and easy-to-find ingredients.
- Occasion: Ideal for quick weeknight dinners, casual get-togethers, or a satisfying meal on-the-go.
Why You’ll Love This Recipe
Firstly, the Ultimate Crispy Philly Cheesesteak Wraps deliver irresistible taste and texture. The salty, savory flavors of the beef mingle with the creamy cheese and sweet peppers, while the crisp outer wrap offers a satisfying crunch that enhances the overall experience.
With a prep time of just 15 minutes, these wraps are perfect for those busy weeknights when you need a quick and delicious meal. Minimal ingredients and straightforward steps mean less time in the kitchen without sacrificing flavor or satisfaction.
From a nutritional standpoint, this recipe offers a good balance of protein, vegetables, and grains. You can control the level of indulgence by opting for leaner cuts of beef or whole-grain tortillas, customizing as needed to fit different dietary needs.
As a versatile dish, these wraps shine at social events, whether for family dinners, casual parties, or packed as a flavorful lunchbox treat. Their portability and easy-to-handle nature make them a crowd-pleaser among both kids and adults.
Lastly, this recipe is cost-effective and uses common kitchen staples, ensuring accessibility for all home cooks. The ingredients are easy to source, keeping both preparation and cost straightforward.
Historical Background and Cultural Significance
The Philly cheesesteak has its origins in the early 20th century in Philadelphia, Pennsylvania. Its invention is credited to Pat Olivieri, a hot dog vendor who innovated with thinly sliced beef and fried onions in a roll, thus creating a gastronomic sensation.
Culturally, the cheesesteak embodies the bustling urban energy of Philadelphia’s streets, serving as both a culinary icon and a mouthpiece for the city’s eclectic character.
Traditionally served on a hoagie roll, this iconic sandwich evolved over time, gaining variations in cheese, toppings, and even bread in different regional interpretations, reflecting the diverse palates across America.
From “wit” to “witout,” the cheesesteak continues to adapt, inviting culinary creativity that fosters regional debates and personal preferences, all while remaining rooted in its classic Philly origins.
Ingredient Deep Dive
The star of this recipe, beef steak, is an integral part of the classic cheesesteak experience. Historically valued for its flavor, beef brings a robust taste and texture, making it an essential component in this dish.
Nutritionally, beef contributes protein and essential nutrients such as iron and zinc. When selecting beef for the wraps, aim for well-marbled steak cuts like ribeye or sirloin for optimal flavor and tenderness.
Storage of beef should be in the coldest part of your refrigerator, ideally used within 3-5 days for peak freshness. For longer storage, consider freezing, ensuring it’s wrapped tightly to prevent freezer burn.
A common substitute for beef is chicken, particularly for those seeking a leaner meat option. Ensure any chosen substitute retains the flavorful punch characteristic of the original Philly cheesesteak.
Common Mistakes to Avoid
- Overloading the wrap can make it difficult to close and cook evenly. Ensure an even distribution of ingredients for ease.
- Avoiding high heat while searing the beef results in a less flavorful experience. A hot skillet ensures a nice crust forms on the steak.
- Skipping the resting phase for the beef may cause juices to be lost upon cutting. Allowing the beef to rest ensures it remains juicy and flavorful.
- Incorrect slicing against the grain can lead to tough, chewy beef. Always slice across the grain for maximum tenderness.
- Using excess oil may result in a greasy, less appetizing wrap. Moderation in oil usage preserves the crisp texture you desire.
- Failing to preheat the grill or panini press can lead to uneven browning. Ensure equipment is hot before cooking the wraps.
- Neglecting to balance the onion and pepper ratio will skew flavor profiles. Maintain a harmonious blend for a balanced taste.
- Not pressing the wrap during grilling may lead to uneven textures. Use gentle pressure for consistent cooking and texture.
Essential Techniques
Searing the beef is a fundamental technique for building flavor. A hot skillet ensures a good sear, creating depth in each bite. Look for a golden crust and resist overcrowding the pan to maintain the heat.
Mastering the vegetable sauté involves controlling texture while enhancing natural sweetness. Aim for tender-crisp veggies by rapidly cooking on high heat with stirring, ensuring they retain their vibrant color and flavor.
Properly assembling the wrap ensures hassle-free eating. Distribute ingredients evenly, folding in the edges first before rolling, to keep the wraps intact and ingredients contained during cooking.
For a crispy exterior, preheating the grill or panini press is crucial. This ensures a quick sear that contrasts beautifully with the tender insides of the wrap.
Pro Tips for Perfect Ultimate Crispy Philly Cheesesteak Wraps
Ensure your beef is at room temperature before cooking to achieve an even sear and cook through.
Finely dicing the onions and peppers allows them to cook quickly and meld perfectly with the cheese and beef.
Warm the tortillas slightly before assembly to make them more pliable and easier to wrap.
Adding a sprinkle of Italian seasoning to the beef can elevate flavors subtly without overpowering the traditional taste.
If using a panini press, a light brushing of olive oil on the outside of the wraps enhances crispiness while maintaining a golden sheen.
Resting the assembled wrap before baking or grilling allows flavors to meld and provides better structure while cooking.
Control the cheese melt by layering it between hot ingredients, ensuring even distribution and creamy pockets in every bite.
For added nutrition, include a handful of baby spinach or arugula in the wraps before grilling.
Variations and Adaptations
In the original Philadelphia version, Cheez Whiz or provolone are popular choices, but feel free to experiment with cheese varieties like mozzarella or cheddar for different flavors.
For a vegetarian adaptation, substitute the beef with portobello mushrooms and combine with caramelized onions and peppers.
Flavors can be adapted seasonally by incorporating vegetables like zucchini in summer or adding a touch of pumpkin spice to the mix in autumn.
Dietary modifications can include using gluten-free wraps or low-carb alternatives like lettuce leaves to cater to different dietary needs.
To modify textures, consider doubling up on the cheese inside for a gooey interior, or adding a crunchy element like roasted chickpeas for an additional bite.
Presentation can be altered by slicing the wraps into bite-sized portions for an appetizer-style serving, ideal for parties and gatherings.
Serving and Presentation Guide
To showcase these wraps, serve them diagonally sliced on a wooden board to enhance the organic vibe, garnished with a sprig of fresh parsley for color contrast.
Accompany with a side of tangy pickles or coleslaw to cut through the richness and add a refreshing crunch to the meal.
For a modern twist, pair with a side of sweet potato fries or a bright, zesty salad to balance flavors and textures.
Serve these wraps hot, straight from the grill or panini press, to ensure the cheese remains gooey and the exterior crispy.
Consider portion control by serving a half-wrap per person as a starter or two as a main course, tailored to the occasion and hunger levels.
Adjust the presentation based on the event; casual settings might enjoy wraps in parchment-lined baskets, while plated slices on fine china bring elegance for more formal gatherings.
Wine and Beverage Pairing
Pair these wraps with a bold red wine like Cabernet Sauvignon. Its robust flavor profile complements the rich beef and creamy cheese.
For non-alcoholic options, a crisp, sparkling water with a twist of lemon can refresh the palate and enhance the meal’s enjoyment.
If you prefer other beverages, consider pairing the wraps with a light ale or a craft IPA for a refreshing counterbalance to the rich, meaty taste.
Temperature is key; serving beverages cold emphasizes contrast, intensifying the cheesesteak’s warm, savory notes.
Artfully serve your chosen beverage in a clear glass to showcase color, add visual appeal, and elevate the dining experience.
Storage and Shelf Life
Store leftover wraps in an airtight container in the refrigerator for up to 2 days to maintain freshness.
Proper wrapping with plastic film or foil prevents wraps from drying out and helps preserve their structure and taste.
Look for signs of spoilage such as sogginess or a sour smell before consuming refrigerating leftovers.
Reheat wraps carefully in a preheated oven or toaster oven for 10-15 minutes, ensuring they maintain crisp edges and melt-in-the-mouth cheese.
Freezing is an option; wrap each uncooked wrap individually in foil, sealing tightly, and place them in a freezer-safe bag for up to a month.
Make Ahead Strategies
Prepare vegetables and slice beef in advance; store them separately in airtight containers until ready to cook, reducing prep time at dinner.
Store beef and vegetables in separate containers, ensuring the beef remains flavorful by the time it reaches the grill.
The quality of assembled wraps is preserved by refrigerating for no more than a few hours before grilling, keeping ingredients fresh.
Assemble wraps just before cooking to maintain structure and prevent sogginess; ensure ingredients remain crisp.
Reheat pre-cooked wraps in an oven or toaster oven to bring back the crispy texture, adding fresh cheese before serving for the ultimate bite.
Fresh ingredients like lettuce or extra cheese can be added just before serving, brightening flavor profiles and textures.
Scaling Instructions
To halve the recipe, simply adjust ingredient amounts, using half of each while maintaining full flavor and texture.
Doubling or tripling requires scaling up your cooking equipment; a larger skillet or additional pans may be necessary.
Adjusting timing slightly to accommodate larger or smaller amounts within one skillet ensures consistent cooking.
Efficient storage considerations involve separating additional portions in airtight containers, or pre-freezing for longer shelf life.
Ensure consistent flavor and quality when scaling by keeping proportions steady and not overcrowding the pan.
Nutritional Deep Dive
Each wrap contains a balanced macro breakdown, with a healthy mix of protein from beef, carbohydrates from tortillas, and fats from cheese.
The cheese adds a source of calcium and vitamin D, supporting bone health, while beef offers iron and B vitamins crucial for energy metabolism.
Portion control is essential in maintaining dietary goals; keeping servings to one wrap can moderate calorie intake.
Whole grain or low-carbohydrate wrap alternatives can support those on specific dietary paths, such as keto or whole-food diets.
The presence of healthy fats, lean protein, and essential vitamins leaves you satisfied without feeling overly full.
Dietary Adaptations
For a gluten-free version, selecting certified gluten-free tortillas ensures those with celiac or gluten sensitivities can enjoy this recipe.
Lactose-intolerant diners can benefit from using lactose-free cheese alternatives that melt the same way as traditional varieties.
For a vegan option, replace beef with vegan strips and cheese with plant-based alternatives like nutritional yeast for a cheesy flavor.
Those on a low-carb diet can savor this wrap by simply wrapping it in crisp lettuce leaves instead of the traditional wrap, preserving the core flavors.
Paleo followers enjoy similar adaptations; switching tortillas for cabbage leaves, paired with grass-fed beef and non-dairy ingredients.
Low-FODMAP alternatives accommodate digestive sensitivities with substitutes like lactose-free cheese and smaller quantities of certain veggies.
The Recipe
Ultimate Crispy Philly Cheesesteak Wraps
Serves: 4
Prep Time: 15 mins
Cook Time: 15 mins
Total Time: 30 mins
Kitchen Equipment Needed
- Skillet
- Panini press or grill pan
- Sharp knife
- Cutting board
- Spatula
- Measuring cups
- Aluminum foil
Ingredients
- 1 pound beef steak, thinly sliced
- 1 tablespoon olive oil
- 1 large onion, thinly sliced
- 1 green bell pepper, thinly sliced
- Salt and pepper to taste
- 8 slices provolone cheese
- 4 large tortillas
Directions
- Heat olive oil in a large skillet over medium-high heat. Add sliced beef, cooking until browned, about 5-7 minutes. Remove from skillet.
- In the same skillet, add onions and green peppers. Sauté until tender, around 5 minutes. Return beef to skillet, stirring to combine. Season with salt and pepper.
- Warm tortillas slightly in a microwave or oven for easy rolling.
- Layer beef mixture and cheese slices evenly among the tortillas.
- Fold the sides and roll each tortilla, securing them tightly.
- Grill wraps using a panini press or in a grill pan until golden and crispy, about 3-4 minutes per side.
- Serve immediately, garnished with fresh parsley if desired.
Recipe Notes
- For added flavor, try adding sautéed mushrooms to the beef mix.
- Store any leftovers wrapped in foil to retain crispness.
- Customize spice level by adding sliced jalapeños or a splash of hot sauce.
Troubleshooting Guide
For texture issues, ensure tortillas are warmed before wrapping; this prevents tearing and enhances folding flexibility.
Balance flavors by adjusting seasoning post-cooking. Taste test before assembling, adding salt or pepper as needed.
Maintaining proper temperature during cooking is crucial; watch heat levels and avoid overcrowding to ensure even browning.
Overcome equipment challenges by using household appliances creatively, such as an oven if a panini press is unavailable.
For ingredient substitutions, maintain original proportions for stability in flavors and textures, swapping similarly weighted alternatives.
Timing concerns? Prepare ingredients in advance or use convenience items like pre-sliced beef to streamline preparation.
Recipe Success Stories
Our community loves the adaptability of these wraps. Many have shared successes in customizing them to family tastes, incorporating local ingredients or personal twists.
Readers report great feedback when serving these wraps at parties. Cutting them into bite-size portions for appetizers earned rave reviews for both taste and presentation.
Exploring variations allowed for delightful surprises, such as the addition of sun-dried tomatoes or avocado slices, enhancing both flavor and nutrition.
Photography tips highlight the importance of natural light when capturing the beautiful, golden-brown crust of these wraps, causing stomachs to rumble as soon as they are shared.
Frequently Asked Questions
Can I prepare the filling ahead of time?
You can absolutely prepare the beef and vegetable filling in advance. Store separately in airtight containers, then assemble and grill the wraps when ready to serve for best results.
Can I use a different type of cheese?
Yes, feel free to substitute provolone with Swiss, mozzarella, or cheddar depending on your preference. Each offers a unique flavor that complements the beef.
How can I make the wraps spicier?
Adding sliced jalapeños or a dash of hot sauce to your beef mixture can elevate the spice level, catering to those who enjoy heat.
Can these wraps be frozen?
Yes, you can freeze the assembled wraps. Wrap them tightly in plastic wrap and aluminum foil before freezing. Reheat from frozen for a delicious, quick meal.
How do I keep the wraps from becoming soggy?
Ensure your reductions or sauces are thickened before folding into the wraps. Also, grilling right before serving minimizes moisture and maximizes texture.
Can I use a different protein?
Absolutely! Chicken or turkey can be excellent alternatives to beef, with each providing their own charm to the wrap.
What side dishes go well with these wraps?
Consider pairing them with fries, a green salad, or a cup of freshly made soup to balance out the richness and add variety to your meal.
How do I ensure the cheese melts properly?
Layer cheese between the hot beef mixture just before wrapping. The heat will encourage smooth melting without additional oven time.
Can I add more vegetables?
Certainly! Mushrooms, spinach, or roasted red peppers make great additions, enhancing both flavor and nutritional value.
What’s the best way to reheat the wraps?
Reheat in an oven or grill pan to retain crispness. Avoid microwaves as they may soften the wrap and reduce texture.
Are there vegan alternatives?
You can substitute beef with marinated tofu strips and use vegan cheese to create a plant-based version while keeping foundational flavors intact.
How long do leftovers last?
When stored properly in the refrigerator, leftovers can be enjoyed for up to two days, maintaining satisfactory taste and texture.
Additional Resources
For those interested in further culinary exploration, related recipes such as classic Philly cheesesteaks, vegetarian wraps, or homemade tortillas provide variety and insight into technique.
Learning how to sear meat perfectly enhances countless dishes beyond this recipe. Explore guidebooks or videos focused on pan-searing to refine this skill.
Ingredient information, especially on regional beef varieties or cheese selections, offers expanded understanding and appreciation for the flavors you explore with each meal.
For equipment recommendations, look into high-quality skillets or cast iron pans that provide consistent heat distribution for the best results time and again.
Evaluate seasonal variations by focusing on farmer’s markets; the freshest onions, peppers, and even tortillas enhance quality, making every wrap uniquely special.
Join the Conversation
Engage with fellow culinary enthusiasts by sharing your wrap creations on social media platforms, sparking inspiration and learning through vibrant exchanges.
Consider writing a detailed review of the recipe or submitting photography capturing the vivid colors and textures of your Cheesesteak Wraps to food blogs or forums.
Participate in community discussions addressing suggested variations or adaptations, focusing on how each individual makes the recipe their own.
Having fun with photography tips can transform the presentation of your wrap into a piece of culinary art, showcasing them creatively through angles and lighting.
Embrace shared experiences from friends or family about this recipe, gathering both praises and improvements to perfect a wrap everyone will adore.