


Easy Jalapeño Popper Cheese Balls – A Snack Delight
Indulge in the rich and spicy flavors of Easy Jalapeño Popper Cheese Balls, a perfect snack to satisfy your cravings. Combining the creamy texture of cheese with the fiery kick of jalapeños, these cheese balls are an ideal appetizer for gatherings and snack time. Their quick preparation time and mouth-watering taste will make them a favorite in your recipe collection.
Quick Recipe Highlights
- Flavor Profile: A creamy, cheesy base with a zesty kick from the jalapeños. Each bite delivers a delightful heat balanced by the mellowness of cheese.
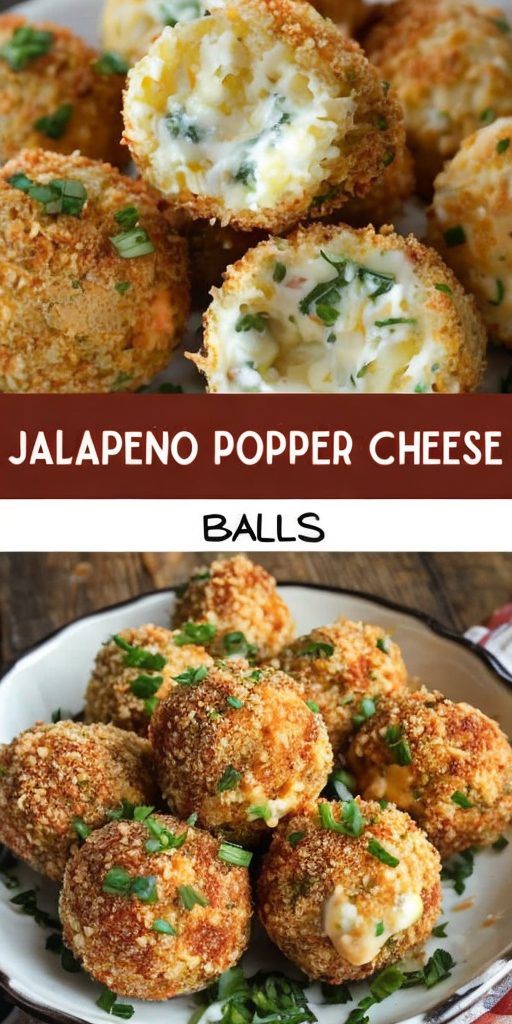
- Texture: Creamy and smooth inside with a crisp exterior, thanks to the breadcrumb coating.
- Aroma: Inviting and slightly tangy with the aroma of fresh jalapeños and melted cheese.
- Visual Appeal: Golden-brown crust speckled with green jalapeño peppers, making them as pretty as they are tasty.
- Skill Level Needed: Perfect for beginners or seasoned cooks due to its simple technique and ingredients.
- Special Equipment: No special tools needed, just basic kitchen utensils for mixing and forming cheese balls.
Recipe Overview
- Difficulty Level: This dish is in the easy category as it requires no complex cooking techniques and minimal preparation.
- Category: Ideal as an appetizer or a party snack.
- Cuisine: Inspired by classic American comfort food with a hint of spice.
- Cost: Economical, with most ingredients being pantry staples or inexpensive store-bought items.
- Season: Perfect for any season, with a special appeal during game days or festive gatherings.
- Occasion: Ideal for parties, potlucks, or simply when you crave a spicy, cheesy treat.
Why You’ll Love This Recipe
Experience the perfect balance of taste and texture with each bite of these jalapeño popper cheese balls. The creaminess of the cheese harmoniously complements the spiciness of the jalapeños, providing an irresistible flavor profile. This snack is not only delicious but also remarkably easy to make, ensuring you spend more time enjoying and less time preparing.
The convenience of this recipe lies in its quick preparation, making it the go-to option for last-minute guests or spontaneous party plans. You don’t need to worry about complicated procedures or exotic ingredients; everything you require is readily available in standard kitchens.
Nutritionally, jalapeños are a good source of vitamins and pack a metabolism-boosting punch. Combined with cheese, this snack isn’t just about indulgence; it’s about tasteful nutrition that adds excitement to your eating experience.
Socially, these cheese balls add vibrancy to your gathering table. They cater to diverse palates, perfect for sharing with friends and family. Each bite is a conversation starter, making your gathering lively and fun.
Not only are they delicious, but they’re also cost-effective and accessible. Most ingredients are budget-friendly and available year-round, ensuring you can whip up this recipe anytime without breaking the bank.
Historical Background and Cultural Significance
The concept of cheese balls has roots in American cuisine, initially gaining popularity as a festive dish. Cheese balls were typically served during holiday gatherings in the mid-20th century, allowing hosts to impress guests with a blend of unique flavors.
Over time, the recipe evolved, incorporating different ingredients and flavors. Jalapeños became a popular addition, thanks to their rising fame in Tex-Mex cuisine. The spicy element added intrigue and excitement, blending traditional American flavors with a modern, fiery twist.
Culturally, jalapeño popper cheese balls represent a fusion between laid-back American comfort food and vibrant, spicy influences from Mexican cuisine. They’re a testament to the creativity and adaptability of culinary traditions across regions.
Regional variations of this recipe have incorporated ingredients like bacon, cream cheese, or different spices to tailor the flavor to local preferences. This adaptability underscores its significance as a staple snack, bringing together people of varying tastes under one flavorful dish.
Ingredient Deep Dive
**Jalapeños** are a key ingredient in this dish, cherished for their heat and bold flavor. Originating from Mexico, they bring an authentic spicy taste and are rich in vitamins A and C. Choose firm, bright green jalapeños for the freshest flavor. Store them in the refrigerator in a paper bag for up to a week. If you prefer less heat, deseed the peppers or substitute with milder options like banana peppers.
**Cheese**, the other star of this snack, offers creaminess and a mild flavor that beautifully complements the jalapeños. Cheese adds calcium and protein, a vital part of the diet. Use sharp cheddar for a robust taste, but feel free to experiment with other cheeses. Store in an airtight container in the fridge to maintain freshness.
Common Mistakes to Avoid
- Using stale breadcrumbs can result in a soft exterior instead of a crispy finish. Always opt for fresh breadcrumbs.
- Overmixing the cheese mixture can cause it to become too soft and difficult to shape into balls.
- Not refrigerating the cheese mixture before rolling can lead to the balls falling apart during cooking.
- Overcooking can cause the cheese to leak out, so keep a close eye on them while baking.
- Skipping the flour coating step will result in the breadcrumbs not adhering well to the cheese mixture.
- Using low-fat cheese can lead to a lack of richness and potential for a gritty texture.
- Failing to deseed the jalapeños thoroughly if you’re sensitive to spicy flavors.
- Inadequate seasoning can lead to bland cheese balls; always taste and adjust accordingly.
- Using the wrong type of cheese, which doesn’t melt well or doesn’t have enough flavor depth.
- Not allowing cooling time before serving, which can cause the cheese balls to lose their shape.
Essential Techniques
**Mixing and Combining**: Proper mixing ensures that the flavors are distributed evenly. Overmixing should be avoided to maintain the integrity of the cheese, ensuring that it melts smoothly rather than becoming a dense mass. Smoothly incorporate ingredients by folding them instead of vigorous stirring.
**Coating**: The key to achieving a crispy exterior is mastering the coating process. First, a coat of flour helps the egg bind to the cheese ball, followed by breadcrumbs that add the color and crispiness. Ensure each ball is completely covered to prevent leakage.
Pro Tips for Perfect Easy Jalapeño Popper Cheese Balls
1. **Chill Well**: After forming the cheese balls, refrigerate them for at least 30 minutes. This step prevents them from falling apart during cooking.
2. **Customize Your Heat**: Control the spice level by adjusting the amount of jalapeños or choosing a milder pepper.
3. **Breadcrumb Perfection**: For an additional layer of flavor, use seasoned breadcrumbs or add a pinch of garlic powder to plain ones.
4. **Keep Shapes Consistent**: Form cheese balls of equal size to ensure even cooking.
5. **Deep Fry Alternative**: For a different texture, try deep-frying instead of baking, which gives a crispier finish but watch the temperature closely.
6. **Double Layer Coating**: For extra crunch, dip the cheese balls in egg and breadcrumbs twice.
7. **Rinse Jalapeños**: If you prefer less heat, rinse jalapeños before using them to remove some capsaicin.
8. **Experiment with Add-Ins**: Consider small diced bits of bacon or chives for flavor variation.
Variations and Adaptations
Regional variations can be as simple as swapping cheddar for a local cheese like pepper jack, adding a different spice such as smoked paprika, or even incorporating ingredients like chopped cilantro for a fresh twist.
Seasonally, you can adapt the recipe with seasonal ingredients, such as adding roasted red peppers for a sweeter note during summer, or subtle spices like nutmeg for a warmth during the winter months.
For dietary needs, swap regular breadcrumbs with gluten-free varieties to make them more accessible, or use a dairy-free cheese alternative for a vegan version that still delivers on flavor.
Play with flavors by adding BBQ sauce or a hint of lime to the cheese mix. This slight adjustment shifts the aroma and enhances the taste experience.
Improve texture by incorporating crushed nuts into the breadcrumb mix, giving an additional layer of crunch, or go for a softer finish by reducing cooking time.
Adapt presentation by serving them skewered with bright cherry tomatoes for visual intrigue and added freshness, perfect for sophisticated appetizer platters.
Serving and Presentation Guide
Serve these cheese balls with a light garnish of fresh herbs like parsley or chives to add a vibrant green contrast to their golden hue. Pair with dipping sauces like ranch or a tangy salsa for added flavor. Arrange them neatly on a platter or use decorative skewers for a touch of elegance.
Consider serving them warm for optimal taste and texture. Allowing them to rest for a few minutes after cooking ensures that the cheese is firm enough to hold its shape while still being gooey inside. Portion control is easy; simply place a few on individual plates to encourage moderation and appreciation of each bite.
Wine and Beverage Pairing
A chilled Sauvignon Blanc with its citrus notes pairs perfectly with the spicy richness of the cheese balls. For non-drinkers, a refreshing lemonade or a citrus-infused soda provides a complementary contrast. In cooler months, a cinnamon-spiced hot cider can enhance the overall flavor profile. When considering coffee or tea, opt for light herbal blends that won’t overpower the taste.
Storage and Shelf Life
Store leftover cheese balls in an airtight container in the refrigerator for up to three days. To maintain their crispness, reheat in an oven or air fryer rather than microwaving. If freezing, do so before cooking, then thaw in the refrigerator and bake as prescribed for freshness without any compromise in texture or flavor.
Make Ahead Strategies
Prepare the cheese mixture a day in advance and keep it refrigerated. The balls can also be shaped and stored overnight, allowing flavors to infuse further. Just coat them in breadcrumbs and bake when needed. This strategy saves time on the day while ensuring that you have fresh-tasting, homemade snacks ready in no time.
Scaling Instructions
For a smaller batch, divide the ingredient amounts by half, and be sure to maintain the same mixing ratios to ensure texture integrity. When scaling up, larger equipment like a bulk mixing bowl may be necessary, and baking time adjustments might be needed to accommodate all cheese balls in one go without overcrowding.
Nutritional Deep Dive
A balance of protein and fats from cheese complements the vitamins in jalapeños. Each serving is a touch indulgent but provides a source of calcium and capsaicin-inspired metabolism benefits. Portion analysis ensures enjoyment without overconsuming, fitting this dish into a balanced diet by acknowledging the richness and savoring smaller servings.
Dietary Adaptations
For gluten-free diets, use appropriate breadcrumbs or alternatives like crushed gluten-free chips. Switching to dairy-free cheese provides a vegan option while following the same process. Keto followers should see this as a moderate-carb treat, but can modify by reducing breadcrumbs or using almond flour for the crust.
The Recipe
Easy Jalapeño Popper Cheese Balls
Serves: 8
Prep Time: 15 mins
Cook Time: 10 mins
Total Time: 30 mins
Kitchen Equipment Needed
- Mixing bowl
- Baking sheet
- Paring knife
- Cutting board
- Oven
- Cooling rack
Ingredients
- 2 cups sharp cheddar cheese, shredded
- 4 large jalapeños, deseeded and finely chopped
- 1 cup cream cheese, softened
- 1 teaspoon garlic powder
- 1/2 cup all-purpose flour
- 2 large eggs, beaten
- 1 cup breadcrumbs
- Salt and pepper to taste
Directions
- Preheat the oven to 375°F (190°C) and line a baking sheet with parchment paper.
- In a mixing bowl, combine cheddar cheese, jalapeños, cream cheese, garlic powder, salt, and pepper. Mix until smooth.
- Shape the mixture into small balls, about 1 inch in diameter, and refrigerate for 20 minutes.
- Coat each cheese ball in flour, then dip into beaten eggs, and finally roll in breadcrumbs.
- Place the cheese balls on the prepared baking sheet and bake for 10 minutes or until golden brown.
- Let them cool slightly on a cooling rack before serving.
Recipe Notes
- For extra heat, leave some seeds in the jalapeños.
- Consider using different cheeses like Monterey Jack for variation.
Troubleshooting Guide
If experiencing texture issues where the cheese balls are too soft or falling apart, ensure they are adequately chilled before coating. For those finding the flavor balance off, a tweak in seasoning, particularly salt, can be the key. Adjust temperature by monitoring oven settings if the exterior browns too quickly.
Recipe Success Stories
Many readers have shared their variations, such as adding bacon bits or experimenting with pepper jack cheese. These adaptations have found great success, with the key being maintaining the original proportions for a harmonious taste experience. Consider using social media to share your own creations or seek advice from others who have tried the recipe.
Frequently Asked Questions
Yes, the cheese balls can be formed a day ahead and kept refrigerated, ready to coat and bake when needed.
Opt for deseeding jalapeños thoroughly or substituting with banana peppers for a milder taste.
Ensure full coating coverage and avoid overcrowding the baking sheet to maintain hot air circulation.
Yes, it’s best to freeze them before cooking, and then bake from frozen when ready, adding a few extra minutes.
Consider gluten-free breadcrumbs and vegan cheese for specific dietary needs without compromising the flavor.
Additional Resources
Explore related appetizer recipes like stuffed mushrooms or spicy nacho dips that bring variety to your dining experience. Grab insights from guides on cheese selections or seasoning tips to further elevate your cooking prowess. Equipment recommendations for this and other similar dishes can refine presentation quality.
Join the Conversation
Engage on social media, sharing your unique adaptations or learning from others’ takes on this popular recipe. Use photography tips to showcase your creations and inspire others. Leave reviews or interact with the recipe community to share experiences and craftsmanship secrets, ensuring rich and wholesome culinary explorations.